

Laqrosta
TUTORIALS
How I edit Horses in Photoshop CS6

This is the Image we'll be working with. Fairly simple, and the background plays to my favor. The horse is dark, while the background is light. You'll see why this benefits me in the future.
I find Lighting extremely important, if it isn't lighted well just don't edit it! To get good lighting press Shift + Ctrl + C and a Code box will come up. Type in: Buydebug on - this shall add a new inventory to your shopping menu when you go into the building and buying parts of the Sims 3 Game. There will be some square, circular and all sorts of shapes lighting there.
Position your horse and rider well and make sure they look good together! There no point trying to Photoshop a Picture - to make it look prettier - if it's already ugly and just weird.
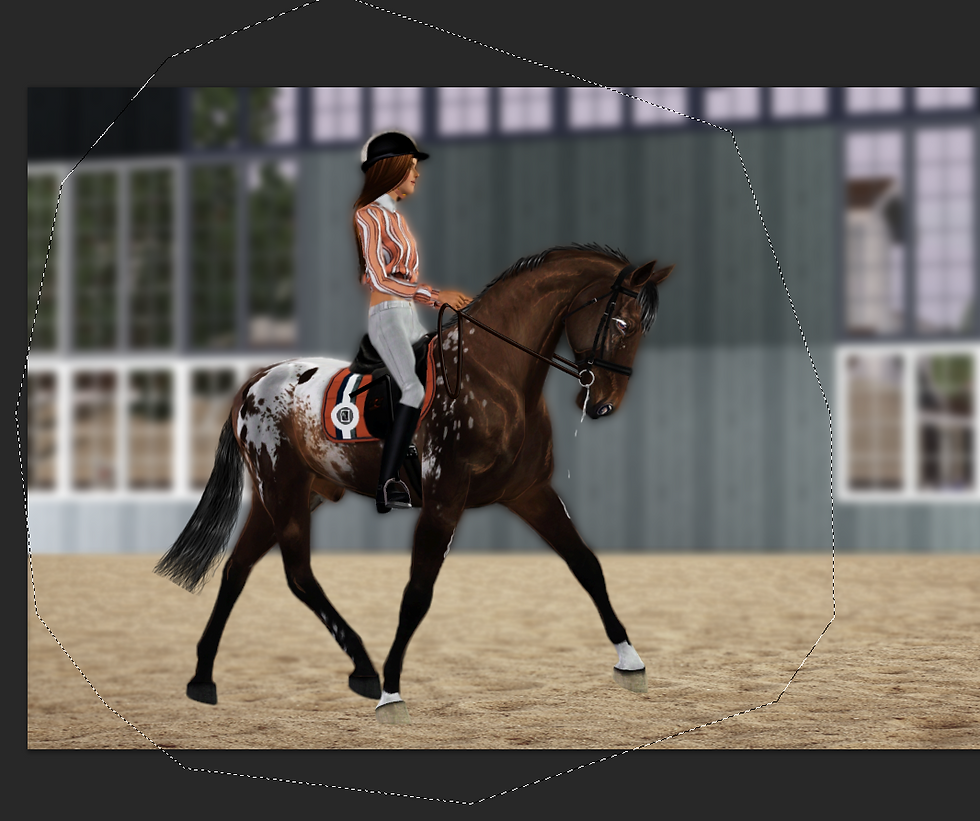
Use the Quick Selection Tool to select your horse. I like to use a Brush size of 7, but you can pick and choose. Select your horse by dragging your cursor over the horse.
To the left you see a bar, this is to show you where its located.
It should then start having black and white lines around the areas you selected (as shown on right). It will select the wrong things occasionally so if it does this select the minus button (shown below).
Use this tool to select the whole horse.

When your whole horse is select press Ctrl + C. This will copy the horse. Then, press Ctrl + V. This will paste the horse onto another layer. The Select tool is basically like the Lasso tool, except it makes things a whole lot quicker!


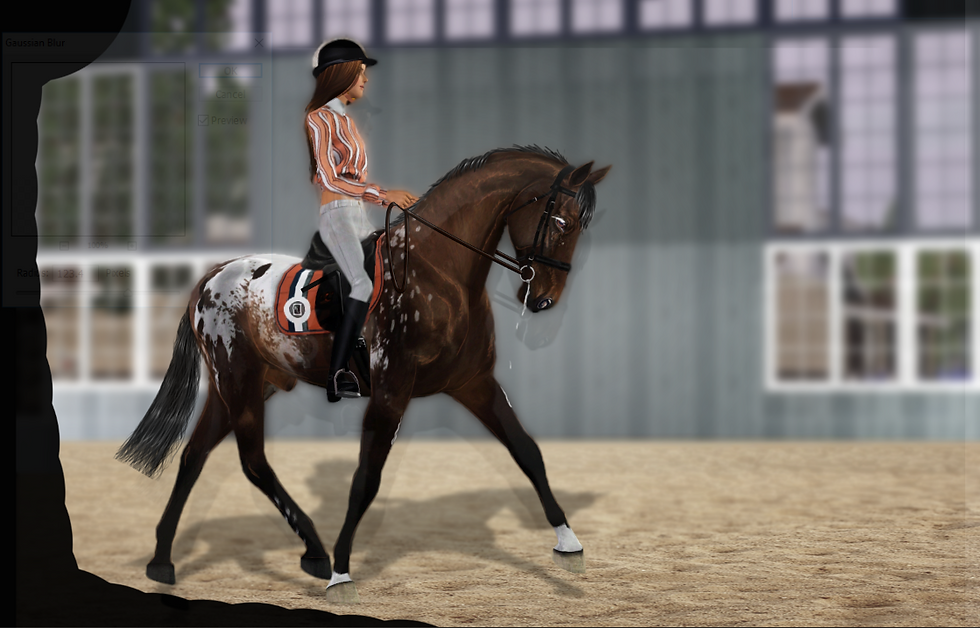
Select Background or the Bottom Layer. Go to File, Blur and select Gaussian Blur. Be careful not to overblur it! The image shows the setting I normally use.
We then have our image. Use the blur tool and set it to brush size 7 and go around the edges, but there is a difference between spaces I would blur and wouldn't...

Here are two closeups of the Image.
The first Image I would Blur. The edges are all pixelated and ugly, and if blurred properly it would smooth the edges and make it look less game-like and more close to the real thing.
The second Image I wouldn't blur. The star is nice and neat, and if I did blur that it would end up leaking onto the page and just looking like a white smudge on the picture, I know this is electronic work I'm talking about but it would look ugly and weird.


Wouldn't Blur
Would Blur
Now to start editing the actual horse. Lets start with the eye. To the right there is a few images of the procedures I go through to draw it. Below is a image of the Brush I used. It is a standard PHOTOSHOP CS6 Brush and is very handy!
It is located in the brush menu a row below the top row and one across.
For the Nostrils just add darklights and highlights in a similar way.

Draw a line in a light grey under the horses eye like shown.

Get a light brown (or whatever colour eye your doing) and make a circle covering the actual horse pupil.

Add a pupil, use a dark blue and black and make a rectangle like shape. On a layer below this add a lighter brown on the bottom of the eye and a darker on top, then blur it.

This really brings the eye to life, and can also cover up some mistakes! Get White and just scribble and make a shape your happy with.


Use a similar procedure for the Nostrils
Do the steps shown using the same brush.

Use the same brush to create the mane. Do small lines and inner lines.

Use the same brush, size it to four,

Use a slightly lighter colour for highlights.

Use an ever lighter colour for even more highlights! Make these ones fewer, though.

Use the Dodge Tool (Selected) to add shine to your mane. Select it to Size 7 and slowly go back and forth across your hair.


Make sure the shape is realistic! Reference Pictures can help.

Use the same brush, size 4.

Use a slightly lighter colour for highlights

A slightly lighter colour again!

Then use the Dodge Tool
Repeat these steps again for the Mane.

Now, our Picture is looking alot nicer! But we still need to do things like the tail, reins, sand, stirrup Leathers, extra details, highlights and darklights on the coat and shadows. But first, we're going to work on the Tail. I use a certain brush for these - the brushes I use is linked below.
Link 1:
http://arrsistable.deviantart.com/art/V-2-Dynamic-Hairy-Brushes-184927741
Link 2:
http://arrsistable.deviantart.com/art/Very-Hairy-Dynamic-117867436
Follow the shown Steps. We add the highlights to add more realisim to the drawing, also to make it look more like the mane and forelock.
We've almost finished the horse! But, there is still alot more to do....

Use the one that is automatically selected at 147.

First, get a rough shape of your tail using the brushes.

Next, use your eraser to neaten up the edges of your tail.

Using the normal size 1 brush I use for everything else, add Highlights over the tail.

Add more Highlights to the tail with a slightly lighter colour. This adds more realisim in the picture, it also makes it more similar to the Mane and Forelock.

Finally, use the Dodge Tool to add some shine across the tail.
Next add slobber using the size one brush and white. This is a indication that the horse is working hard in real life, so if you add this it adds more realism to the picture.

Use the instructions showed for the Reins and Stirrup Leathers.


Click and drag to make the Rein Shape

Just click an area and drag. This will make a curve.

Don't worry if it isn't quite right! We use an eraser to neaten it up.

Erase the areas you mucked up on.
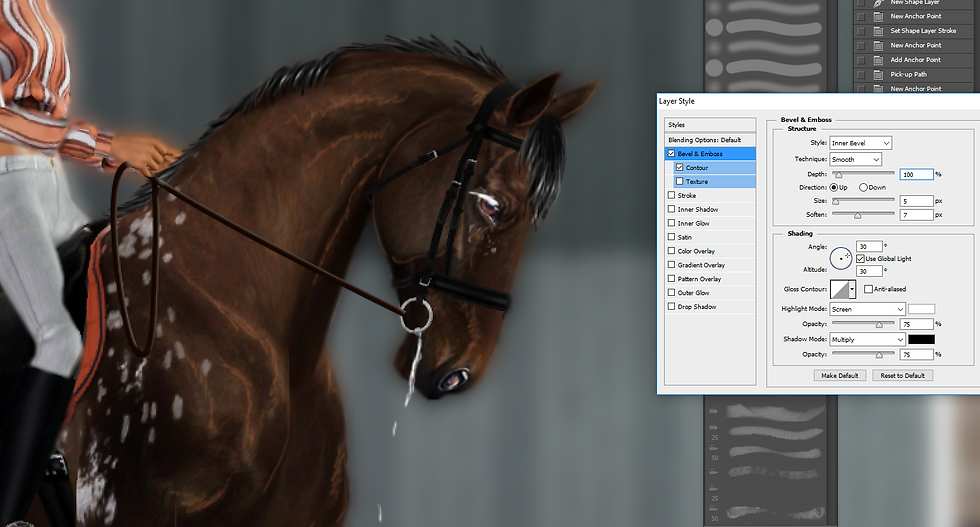
Double click the layer your reins are on a setting like this should pop up, or a colour menu. Keep clicking that until it pops up. Play around with the settings.

The sttings I have done works best for me.

Next do the Sand or other ground materials, for grass it would be a similar process.

First, find a good Sand Image. Just search up "Sand Arena". I always use this image. Copy it and paste it into your picture - make sure its on a lower layer!

Make sure the Sand is in the right size and shape, then use Saturation Adjust and play around with the settings until you have a colour happy with.


Grab your Blur tool and Blur the edge of the Sand, this makes the Camera Focus more realistic.
Then press Ctrl + E to merge your detail layer onto your horse - this will only be briefly. Lasso your horse and then, select the move tool and briefly move your horse. This will only select the horse, not the whole thing surrounding it. Open up a new layer. Select black and, on the new layer, get the biggest brush you can and fill in the space. Press Ctrl + C. Then, undo all the way up to merging your horses details and the horse to the same layer. Press Ctrl + V and boom! There is your black horse, which will be used as a shadow. Drag it onto a lower layer and position it to make it in a good pose. Then lower the opacity and blur it slightly - this is all shown in the photos.

Move it slightly and it will automatically just select your horse.

Open up a new layer and fill it in with black.

Copy and Paste it and move it onto a layer behind the horse.

Move the shadow to a suitable position

Blur it and change the Opacity.
Now, we're almost finished! However, lighting is important... Use the photos and follow the steps.

Use a big brush!

Next is to blur it, feel free to use my settings :)
Repeat with black around the edges.
Repeat with black around the edges.
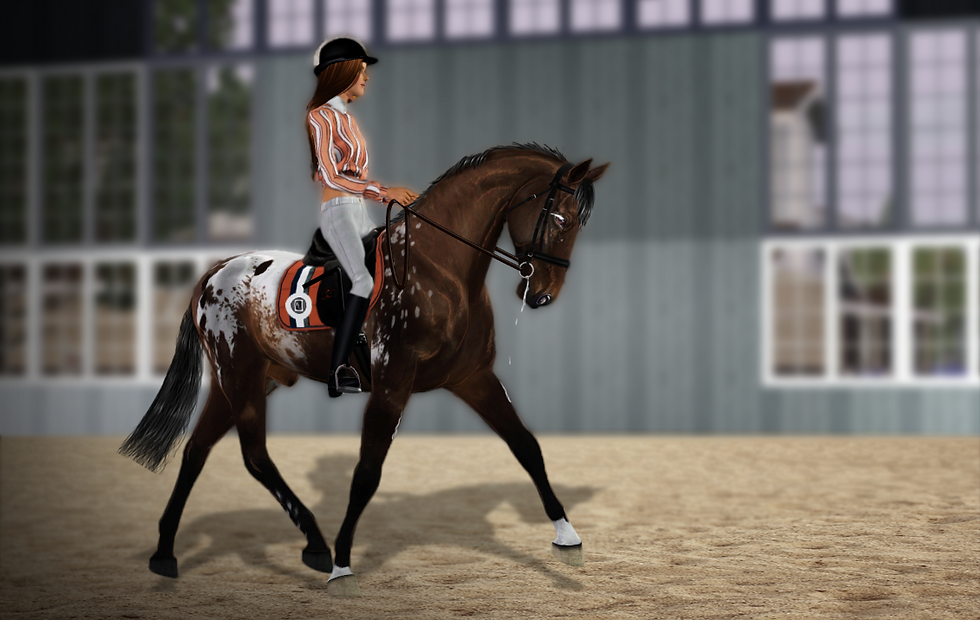
Hope this helped! If you have any questions, let me know!
Before

After

